When it comes to sprucing up your garden, one of the most important steps is learning how to seal a fence with a sprayer. But what if you don’t know where to start? Not to worry – we’ve got all the information and tips that you need in order to make sure your fencing looks its best. From preparing the surface for application, selecting an appropriate sealant, applying it correctly and finishing touches like maintenance; this guide will have everything covered so you can confidently tackle any job related to sealing a fence with a sprayer. So let’s get started.
Table of Contents:
- Preparing the Fence
- Choosing a Sealant
- Applying the Sealant
- Finishing Touches
- Maintenance Tips
- Conclusion
Preparing the Fence
Preparing your fence for staining and sealing is a crucial step in ensuring that it looks its best. It’s important to take the time to properly prepare the surface before applying any sealant or stain, as this will help ensure that the job lasts longer and looks better.
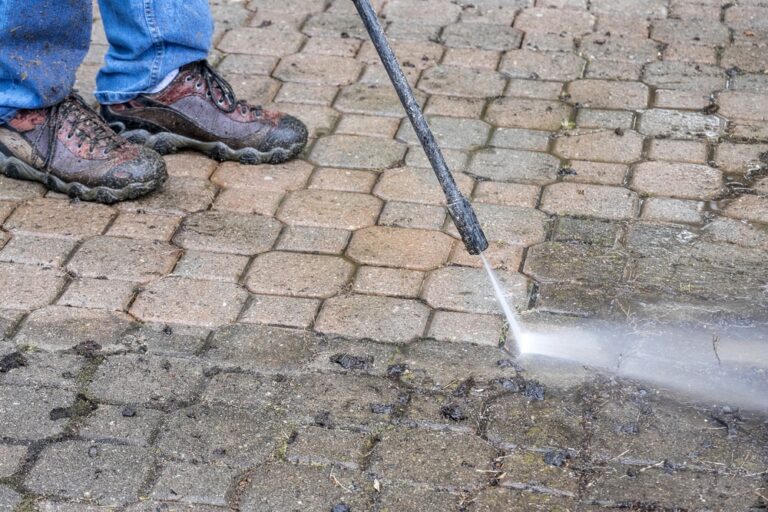
The first step is to clean off any dirt, dust, debris, or mildew from the surface of your fence. This can be done with a pressure washer or by scrubbing with soap and water. Make sure you get into all of the nooks and crannies, so no dirt remains on the wood.
Once you have cleaned off all of the dirt, sand down any rough patches on your fence using medium-grit sandpaper. This will help create an even surface for staining and sealing later on.
If there are any existing sealants present on your fence already, they must be removed before continuing further steps in preparation for staining and sealing. Use a chemical stripper specifically designed for removing old coatings from wood surfaces such as decks or fences; these products are available at most home improvement stores. Follow instructions carefully when using these products as they can be hazardous if not used correctly. Once all of the old sealant has been removed, use fine-grit sandpaper to smooth out any remaining residue left behind from stripping process before proceeding with staining/sealing preparations.
Finally, make sure that your fence is completely dry before beginning to apply new stain/sealant; moisture trapped beneath new coating could cause bubbling or peeling later down the line. Allow 24 hours after cleaning/sanding process has finished prior to starting the application process just to be safe.
Choosing a Sealant

When it comes to choosing a sealant for your fence, there are several factors to consider. Firstly, you need to decide what type of sealant is best suited for the material your fence is made from. For instance, if you have a wooden fence then an oil-based sealant would be ideal as it will protect against water damage and rot. On the other hand, if you have a metal or plastic fence, a silicone-based sealant would be better as it won’t corrode over time, like some oil-based products can.
The next thing to consider when selecting a sealant is its durability and weather resistance. If you live in an area with harsh winters or frequent storms then look for something that has been designed specifically for those conditions such as one that contains UV protection or waterproofing agents. Alternatively, if your climate tends to stay relatively mild throughout the year then any standard product should suffice but make sure that whatever brand you choose offers good customer service in case anything goes wrong down the line.
Finally, always read through any instructions carefully before applying the product and follow them closely in order to get optimal results. Make sure to double-check the manufacturer’s packaging for coverage information so that you don’t run out of sealant before finishing all of your fencing panels. If this information is not provided, then contact the manufacturer directly prior to making a purchase.
Applying the Sealant
Spraying sealant is a great way to protect your fence from the elements. It’s important to make sure you do it correctly, so that you get an even coverage and the best protection possible.
Start by preparing the area around your fence. Make sure there are no plants or other items near where you will be spraying, as they could be damaged by overspray. You should also cover any nearby windows with plastic sheeting to prevent them from getting wet during application.
Once everything is ready, it’s time to start spraying. Put on protective clothing such as goggles and gloves before beginning work, then fill up your sprayer with sealant according to manufacturer instructions. If using a pump-up sprayer, make sure not to overfill it – this can cause clogging and uneven coverage of the sealant when applied.
When applying the sealant, hold the nozzle about 12 inches away from the surface of your fence for optimal coverage without too much build-up in one spot (this can lead to runs). Move slowly along each section of fencing while keeping a consistent distance between yourself and the surface being sprayed – this will help ensure an even coat throughout all areas of your fence line. When finished with one section move on to another until all sides have been covered completely in an even layer of sealant material.
Finally, turn off any fans or open windows that may blow away some of your newly applied coating before allowing it time to dry completely; usually at least 24 hours. After drying has occurred, check for any missed spots or thin patches which may need additional coats applied if necessary for full protection against moisture damage and weathering effects over time.
Finishing Touches

Once you have applied the sealant to your fence, it’s time for the finishing touches. You can add a personal touch to your fence by adding decorative accessories such as trellises, lattices or planters. These can be used to create an attractive and inviting outdoor space that is both practical and aesthetically pleasing.
Trellises are a great way of creating extra height on a fence without having to build additional panels. They come in various sizes and shapes, so you can choose one that best suits your needs. Lattices provide more privacy than trellises but still allow some light through them which is perfect if you want some privacy but don’t want to completely block out natural light from entering your garden area. Planters are also an excellent way of adding colour and texture to a plain-looking fence while providing an ideal spot for plants or flowers to grow in abundance.
Finally, consider installing lights along the top of the fence line either directly into the posts or onto wall brackets depending on what type of lighting system you prefer; solar-powered LED lights work well. This will help brighten up any dark areas around the perimeter while also making sure everyone stays safe when walking around after dark.
Maintenance Tips
When it comes to keeping your newly sealed fence looking its best, regular maintenance is key. It’s important to clean the fence regularly with a mild detergent and warm water. This will help remove any dirt or debris that may have built up over time. Additionally, you should inspect the sealant every few months for signs of wear and tear such as cracks or fading. If you notice any damage, it’s important to repair it right away before it gets worse.
Re-sealing your fence every few years is also recommended in order to keep the wood protected from moisture and other elements that can cause rot or decay. When re-sealing, make sure you use a high-quality sealant specifically designed for outdoor fences so that it lasts longer and provides better protection against the elements.
By following these simple tips, you can ensure that your newly sealed fence looks great year after year.
Conclusion
Staining and sealing a fence with a sprayer is an easy, cost-effective way to protect your outdoor space from the elements. With the right preparation, materials, and technique, you can ensure that your fence will remain in good condition for years to come. So if you’re looking for an efficient way how to seal a fence with a sprayer, follow these steps and you’ll be sure to get great results.